Other projects from this group
ESP32 WebApp with chain network feature Arduino Base Source Code
With this Chain Network Arduino Base Source Code and the WebApp Builder, design an ESP32 WebApp (web UI) for your WiFi modules projects.
ESP32 WebApp Builder + Chain Network Feature (Arduino Source Code) - Rev 1.4
Price:
Other projects from this group
This project has a base source code which also has the chain network feature and a WebApp builder file which lets you customize your own WebApp style and menus.
In the chain network, the first device is the master of network. The master determines the timing of the “userGlobal()” function. The starter (either the master or the last joined module) is directly connected to the WebApp. It sends the command to the next device, and the next device sends it to the next one till the last device. The last device response will be sent to the first device and finally the WebApp via the middle devices.
There are the following files in this project:
- ESP32WebAppBuilder.html – The Web App builder file. You can open this file with a web browser like Firefox, google Chrome, edge etc.
- example folder – This folder contains a simple example program of the WebApp and the chain network.
- ESP32WebApp folder – This folder contains an “Arduino Base Source Code” which you can use for your ESP32 programs. This folder contains the following system files:
- ESP32WebApp.ino (Main handler file)
- AC.h (Configuration header file)
- AC.ino (Configuration handler file)
- functions.ino (System functions)
- rootPage (UI handler file)
And the following blank user files for your WebApp:
- user_global.h – You can define your global variables and definitions in this file.
- user_init.ino – This file has a “userInit()” function which calls once at the startup.
- user_loop.ino – This file has a “userLoop()” function which calls repeatedly (like arduino “loop()” function).
- user_settings.ino – This file has a “userGetSettings()” and a “userSetSettings()” functions which can get or set the user settings in the WebApp’s settings menu.
- user_main.ino – This file has a “userMainInit()” function which calls once after you click on the WebApp’s main menu and “userMain()” which calls intervally as long as the WebApp main menu is open.
- user_sub.ino – This file has a “userSubInit()” function which calls once after you click on the WebApp’s sub menu and “userSub()” which calls intervally as long as the WebApp sub menu is open.
- user_global.ino – This file has a “userGlobal()” function which calls at the same time in all of the devices in the network. This function will be called when the app sends a command to the network (after userMain and userSub).
Webapp.h – This file contains the WebApp’s source code and can be generated by the WebAppBuilder file.

The WebApp Data
In the Arduino source code, there are 8 “unsigned int” variables (uiAppData[0]… uiAppData[8]) which are shared between the module, the WebApp and all of the modules in the chain network.
These variables may change after any transactions, so they are not suitable for storing the user program data.
When the main menu or sub menu opens in the web application for the first time, the WebApp asks for the uiAppData. The starter fills its own data into the uiAppData, then sends it to the next device, until the last device and then the response (uiAppData) will be sent to the WebApp.
Then a user script in the WebApp can be executed according to the uiAppData values.
After the first initialization, the WebApp can either send the data intervally or when a change in the app elements occurs.
So the web application sends its data to the starter device as “uiAppData”.
The starter makes its own changes in the uiAppData and sends it to the next device until the last device.
The last device sends the uiAppData back to the WebApp via the other devices.
Also the script will be executed in the WebApp after receiving the uiAppData array.
The Web Application
The web application is placed in the root page address which is 192.168.4.1 by default and can be set to 192.168.5.1 or you can use the router’s DHCP IP. The WebApp is divided to 3 menus. The menus can be selected by click on the menu button.
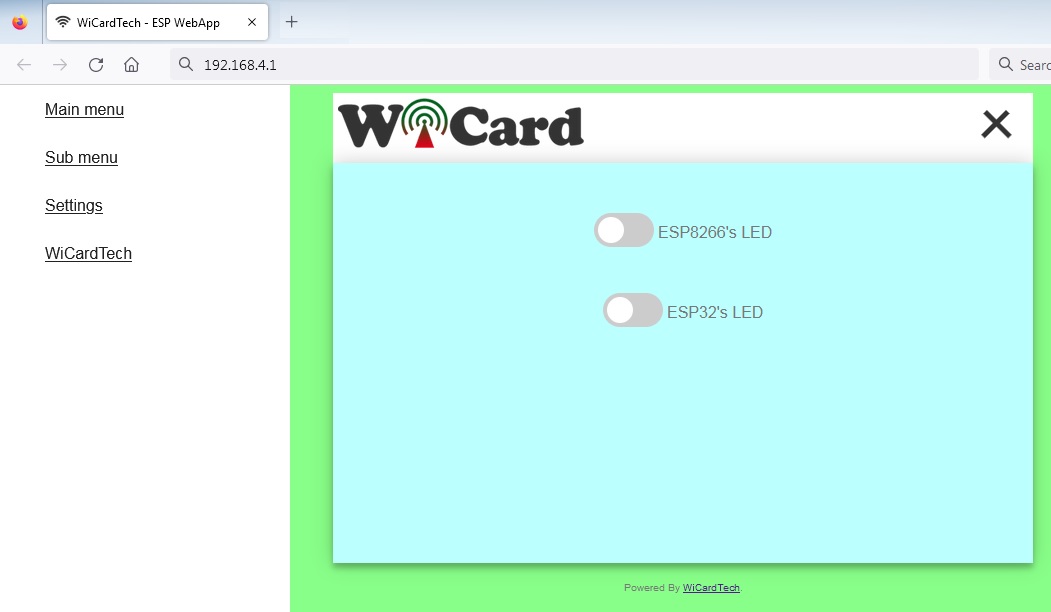
After selecting the menu, the WebApp asks for the initial WebApp Data (uiAppData) and then runs the WebApp script.
- The “Main menu”, “Sub menu”, logo, link, titles and the colors can be customized in the WebApp builder.
- Also you can add your customized settings to the Settings menu.
The Web Settings menu
The web application’s settings menu has been divided to 5 parts:
- Modem Configuration
In this section you can see the available access points, the connection status, the device MAC address and the DHCP IP.
Also in this section you can set the SSID and password of the modem’s access point. - Device Hotspot Configuration
In this section you can set your module’s hotspot SSID and password.
The secure link is a string which will be added at the end of your module’s IP address. For example if you set it “123”, the IP address of the WebApp of your module will be 192.168.4.1/123 instead 192.168.4.1
The even means the default IP is 192.168.4.1, the Odd means the default IP is 192.168.5.1
Hidden HotSpot will set the HotSpot hidden.
Temporary HotSpot will disable the HotSpot right after the module is connected to the modem or joined to the network (For the last device in the network). - User-Defined Settings
You can define these settings in the WebApp Builder. - Local Network Configuration
In this section you can set the “Master” device and also set the userGlobal() function execution delay.
The linked WiCard IP is the IP of linked device to the module’s access point.
If you don’t turn on the “Join Required” switch, the module will be set as Master. - Local Network Map
In this section, the attached devices in the chain network will be shown.
For the master, it starts with master’s SSID, then the second ESP device, until the last one, but for the last device, the sort is vice versa.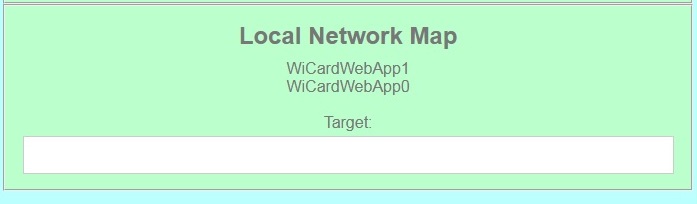
If you are going to send the command to only just a specific device, type its SSID in the Target text box.
ESP32 WebApp Builder
In the ESP32WebAppBuilder.html, you can customize the WebApp’s template colors, the font colors, the logo, the page icon, the main menu and sub menu title, the page title, the menu external link title, the settings, main menu and sub menu elements and the main menu and sub menu script.
The WebApp Builder can directly generate the webapp.h or generate the WebApp code.
You can run the WebApp builder with a standard web browser (no need to the internet connection).
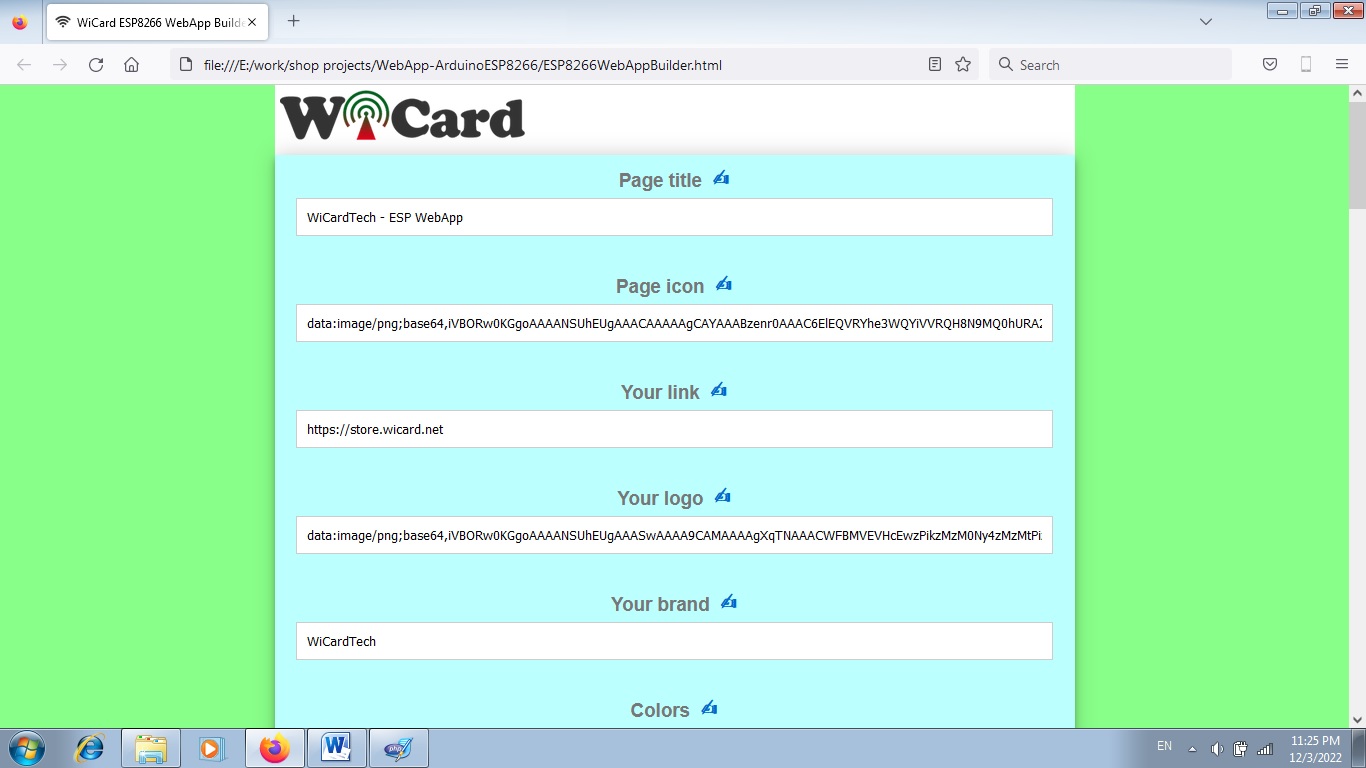
By click on the "Note" icon, the manual and descriptions of each part will be appeared.
ESP32 WebApp Programming
For the programming, use the pre-defined functions in the files which start with “user”.
Add your start-up script to the “userInit()” function in user_init.ino file. No need to do wifi or server configuration. This configuration already have done in the firmware system files (e.g. systemInit() and setup()).
The “userLoop()” function (user_loop.ino) calls repeatedly (like arduino “loop()” function), If your program needs to execute a statement repeatedly (e.g. reading a sensor’s data), insert your script in this function.
The “webapp.h” file is the root page’s script. This file can be generated by the WebApp builder or you can directly insert the application script into the sWebApp variable in that file.
With the “userGetSettings()” function (user_settings.ino), you can place the device user-defined settings into the uiAppData variables. The WebApp execute this function when you click on the Settings menu.
After you click on the SAVE button of the user-defined settings, the “userSetSettings()” functions will be called.
- The settings will not be shared in the network and each device has its own settings.
The “userMainInit()” in the “user_main.ino” file, calls once and only just in the network starter when you click on the main menu (or initially after loading the root page). You can initiate the uiAppData in this function.
The “userMain()” in the “user_main.ino” file, calls intervally or by clicking on the main menu elements. The WebApp will send the uiAppData to this function and then it can be transferred in the chain network.
The “userSubInit()” in the “user_sub.ino” file, calls once and only just in the network starter when you click on the sub menu.
The “userSub()” in the “user_sub.ino” file, calls intervally or by clicking on the main menu elements. The WebApp will send the uiAppData to this function and then it can be transferred in the chain network.
- Only if you call “globalCmdEnable();” function at the end of “userMainInit()”, “userMain()”, “userSubInit()” and “userSub()”, the uiAppData will transferred in the chain network.
- The “networkStarterCheck()” bool functions says whether the module is the network starter or not.
The “userGlobal()” function in the “user_global.ino” file calls at the same time in all of the devices in the chain network after the “CMD delay” time.
In the AC.h file, if you remove “#define LOG_ENABLE”, the logs will not be shown and the log memory would be released.
1.4
- Bugs fixed
- User functions added
- WebApp builder added
1.3
- Appearance and UI changed
- Chain network added
- Secure-link bug fixed
1.2
-Internal pages secure link
-server script
1.1
-Showing the MAC and IP address in the config page
1.0
-Set module hotspot and modem’s SSID and password
-Automatically connection to the modem
-config page
-Hidden hotspot button
-Disable hotspot button